Crafting popsicle stick Christmas trees is a festive way to celebrate the holiday season. This simple and enjoyable craft project can be a fun activity for individuals of all ages. Whether you’re looking for a quiet afternoon crafting by yourself or a group activity with kids, making Christmas trees from popsicle sticks offers an accessible and creative way to add a personal touch to your holiday decor.

Gathering the right materials is the first step in creating your popsicle stick Christmas tree, which ensures a smoother crafting experience. Safety is also important, especially when crafting with young children, as it involves using adhesives or small decorative items. As you progress through making your popsicle stick Christmas tree, you’ll find that there are numerous variations to explore, from the simple layering of sticks to creating intricate and colorful designs, giving each tree its unique flair.
Key Takeaways
- Popsicle stick Christmas trees are a customizable and enjoyable craft.
- Proper preparation and safety are crucial for a successful crafting session.
- These crafts can be personalized with various techniques and decorations.
Materials Needed

To ensure a successful crafting session, gather all necessary materials beforehand. This preparation will allow for a smooth and enjoyable process when constructing your popsicle stick Christmas trees.
Popsicle Sticks and Alternatives
- Popsicle sticks: Standard and jumbo popsicle sticks.
- Alternatives: Coloured or green craft sticks available at craft stores or online.
Adhesives and Cutting Tools
- Glues: Use white wood glue for a strong bond or a glue gun for rapid adhesion.
- Cutting tools: A sharp pair of scissors or a utility knife.
Decorative Elements
- Ornaments: Beads, gems, sequins, and small Christmas ornaments.
- Extras: Sparkly pipe cleaners, rhinestones, pom-poms, jingle bells, and ribbons for embellishments.
Paints and Finishing Touches
- Paints: Green acrylic paint for base coloring. Glitter glue or glitter for added sparkle.
- Finishing Touches: Use a gloss or matte finish spray to protect the paint.
Crafting Accessories
- Basics: Paintbrushes of varying sizes, a paper plate for mixing paints, and felt or construction paper for the base.
- Extras: Star stickers or a cut-out star, twine for hanging loops, and card stock for gift tags.
Supplementary Items
- Cardboard: For a sturdier base or to create a 3D effect.
- Dollar Store Supplies: Economical options for bulk craft supplies.
- Online Supplies: Affiliate links to Amazon Associate for convenient online purchasing.
Preparation and Safety
Prior to creating popsicle stick Christmas trees, it’s important to have a clean workspace and follow safety guidelines, particularly when handling tools like scissors and hot glue guns. These precautions ensure a smooth crafting experience.

Setting Up Your Workspace
First, clear a large area on your table or desk to provide enough space for your materials. Cover the surface with newspaper to protect it from spills or drips of glue. Organize your popsicle sticks, scissors, hot glue gun, and any decorations within reach to maintain efficiency and prevent distractions during your project.
- Materials Needed:
- Popsicle sticks
- Newspaper
- Scissors
- Hot glue gun or regular glue
- Decorations (optional)
- Workspace Preparation Steps:
- Clear the area of unnecessary items.
- Lay down the newspaper.
- Arrange all crafting tools and materials neatly.
Safety Precautions
Your safety is paramount. Always use scissors with care, cutting away from yourself to prevent injury. The hot glue gun should be placed on a heat-resistant surface when not in use and never touch the metal tip. If you need to use a utility knife for precision, do so on a cutting mat and keep the blade retracted when not in use. Ensure all tools are unplugged and stored safely after your crafting session.
- General Safety Tips:
- Cut away from your body.
- Use a heat-resistant surface for the hot glue gun.
- Retract the utility knife blade when not in use.
- Important Reminders:
- Wear protective eyewear if available.
- Have a first aid kit accessible.
- Keep a burn relief gel or cold pack handy in case of minor burns from the glue gun.
- Supervise children at all times if they are participating.
Step-By-Step Crafting Guide
Creating a popsicle stick Christmas tree requires assembling a sturdy base, decorating with festive materials, and adding final touches for an eye-catching display.
Creating the Tree Base
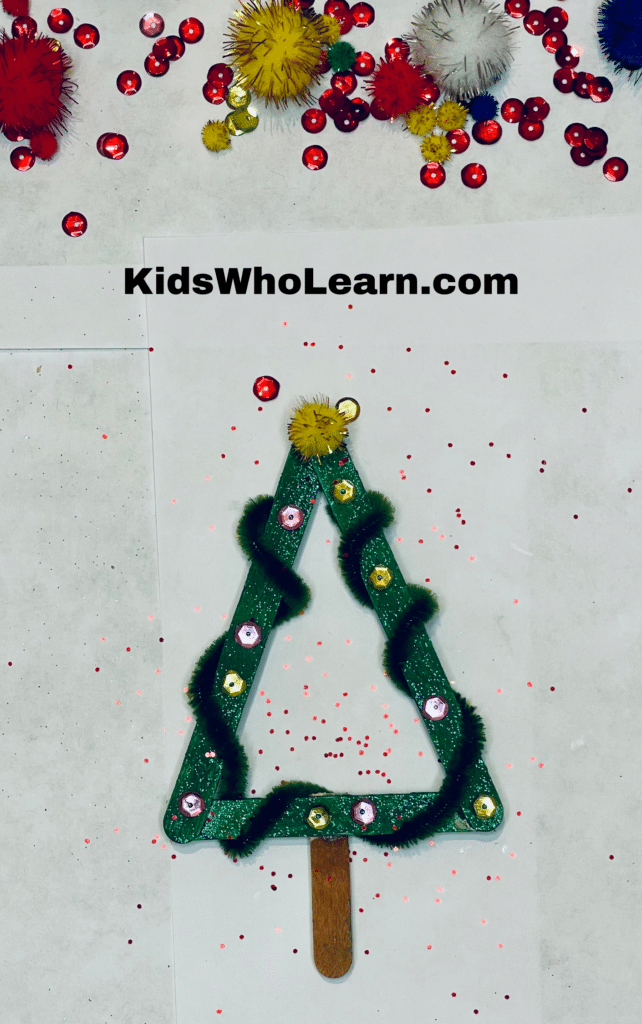
To create your tree base, you’ll first need green popsicle sticks for the foliage and regular popsicle sticks for the trunk. Arrange the green sticks in a triangle shape to resemble the body of a tree, affixing them with hot glue for a secure hold.
- Lay out three popsicle sticks to form a triangle.
- Glue each connection point with a dab of hot glue.
- For the trunk, take one or two regular sticks and glue perpendicular to the triangle’s base.
Decorating the Tree
Once your base is ready, it’s time to decorate your tree. You can use paint or glitter glue to add color, and then embellish your tree with various ornaments such as beads, rhinestones, or buttons.
- Paint the sticks with acrylic paint and a paint brush; let dry.
- Apply glitter glue or tinsel to mimic garland.
- Affix beads, buttons, or rhinestones to represent Christmas ornaments.
| Material | Purpose |
|---|---|
| Glitter glue | To outline the tree and add sparkle |
| Beads & Buttons | To serve as ornaments |
| Tinsel | To wrap around as garland |
Adding the Finishing Touches (Optional)
Top your tree with a star and create a loop from a ribbon for hanging. To give it a more finished look, glue a gift tag or card stock at the back for a clean appearance.
- Attach a star sticker or a small star ornament to the apex of the tree.
- Secure a looped ribbon or twine at the back top for easy hanging.
- Optionally, mount the tree on card stock for a backing or add a personalized gift tag.
Variations and Creative Ideas

When constructing popsicle stick Christmas trees, variations in design and themes for specific occasions can add a personal touch to your holiday craft. Below are some tailored ideas for creating unique and themed trees.
Alternative Designs
- Asymmetrical Tree: Instead of a traditional symmetrical tree, experiment with an asymmetrical design. Arrange your sticks in descending order of length on one side and sporadically on the other to create a more abstract look.
- 3D Trees: Build a three-dimensional tree by creating multiple triangular tree shapes and gluing them together at the edges. The result is a freestanding decoration that can be viewed from all angles.
- Colorful Trees: Color your popsicle sticks before assembly with paint or markers. A gradient of green shades or a non-traditional palette can give your tree a unique flair.
Themed Trees for Occasions
- Elegant Celebration: Decorate your popsicle stick Christmas tree with metallic paint and glitter. Use gold or silver ribbon to hang your creation or add as a tree-topper for a festive and classy look.
- Winter Wonderland: Embrace the winter spirit by adorning your tree with a cold-weather theme. Think snowflakes, icicles made from fishing line and beads, and a dusting of white glitter to mimic a snow-covered tree.
- Kids’ Craft Day: With the help of children, create colorful and playful trees using bright paints, sequins, and stick-on gems. Encourage creativity and let their imagination dictate the decorations for a fun holiday craft day.
Educational and Entertainment Value
Creating popsicle stick Christmas trees offers both educational and entertainment value at a time when engaging activities are most welcomed. Below, we explore how crafting these holiday decorations can be a learning experience for children and a bonding activity for the whole family.
Learning Skills Through Crafting
When you and your children engage in making popsicle stick Christmas trees, you’re not just crafting—you’re learning. The activity can help kids develop fine motor skills as they handle small materials like popsicle sticks, glitter, and sequins.
- Scissor Skills: Cutting out decorations improves hand-eye coordination.
- Gluing: Applying glue aids in learning about quantities and adhesion.
Additionally, they’ll grasp the concept of patterns and symmetry during the decorating phase. This simple Christmas craft is particularly beneficial for preschool students as an easy Christmas craft idea that mixes fun with fundamental skill development.
Crafting as Family Activity
Crafting popsicle stick Christmas trees is a heartwarming activity that allows for quality family time during the holiday season.
- Teamwork: Assign roles to family members—cutting with scissors, gluing, or decorating.
- Sharing Supplies: Learning to share craft materials like scissors, paper, and decorations is a valuable lesson in cooperation.
This Christmas craft idea not only results in charming decorations for your home but also fosters a collaborative and joyful environment. It’s a memorable way to create keepsakes while spending time together, making it an ideal pursuit for the holidays.
Online Resources and Inspiration
Crafting a popsicle stick Christmas tree can be a festive and creative activity. You have a myriad of online resources and platforms to guide you, from social media networks offering a wealth of visual inspiration to online retailers providing the materials you need.
Social Media and Crafting Communities
- Instagram: Browse through thousands of posts using hashtags like
#PopsicleStickCraftsand#ChristmasTreeCraftingfor diverse design ideas and tutorials. Follow accounts dedicated to crafting for daily inspiration and step-by-step guides. - Crafting Communities: Join forums or Facebook groups where crafters share their creations and tips. These platforms are a treasure trove for both novice and experienced crafters, offering support and a space to showcase your popsicle stick Christmas trees.
Online Stores and Materials
- Dollar Store: Your local dollar store’s online platform can be a cost-effective place to purchase bulk popsicle sticks and basic crafting supplies. They often provide seasonal deals that can help you save on crafts.
- Amazon Associate Links: When looking for specific craft supplies, Amazon offers a wide variety, from colored sticks to decorative elements. Use Amazon Associate recommended products for high-rated items and possibly earn cashback on purchases.
| Material | Source |
|---|---|
| Popsicle Sticks | Dollar Store (In-store or online), Amazon |
| Adhesives & Paints | Amazon, Craft stores online |
| Decorative Accessories | Local arts and crafts store online, Amazon Associate links |
Creating for Gifting and Selling
Popsicle stick Christmas trees are a simple yet delightful way to add a personal touch to your holiday gifts or even to create items for sale that convey a homemade charm.
Popsicle Stick Ornaments as Gifts
When making popsicle stick ornaments to give as gifts, you can infuse a bit of your personality into each piece. Start by gluing three or four popsicle sticks into a triangle or a fan shape to represent the Christmas tree. Decorate them with paint, glitter, or other embellishments, keeping in mind the preferences of the person you’re gifting to. Add a simple loop of twine at the top, which serves as a practical hanger for the ornament. You can also attach a small gift tag to the twine, writing a heartfelt message or the recipient’s name for a personalized touch.
Crafting Homemade Christmas Decorations
For those interested in creating popsicle stick Christmas tree crafts for selling or to use as homemade decorations, consider the aesthetics of your current Christmas decor.
| Supplies Needed | Purpose |
|---|---|
| Popsicle sticks | To form the base of the Christmas tree |
| Glue | To assemble the tree shapes |
| Green paint or markers | To color the trees |
| Embellishments (sequins, beads) | To decorate the trees |
| Twine | For hanging the ornaments |
Assemble the sticks into the desired shape, using glue to secure the connections. Once the glue dries, paint your trees green or any other festive color of your choosing. Decorate your trees with small ornaments such as sequins, beads, or even miniature garlands. Remember to glue a piece of twine to the back or top of each decoration for easy display. If you’re selling your creations, pricing should reflect both the cost of materials and the time invested in crafting each piece.
Recycling and Sustainability

In the design of popsicle stick Christmas trees, your choice of materials and method can support sustainability and recycling. The following subsections provide guidance on how to include eco-conscious practices in your craft projects.
Repurposing Materials
- Source Responsibly: Opt for popsicle sticks that are remnants of your ice cream indulgences or gather from a local craft group’s leftover supplies.
- Reuse and Recycle: Encourage the repurposing of other materials in your craft, such as using old buttons or fabric scraps as decorations for your Christmas trees.
Eco-Friendly Crafting Notes
- Non-Toxic Materials: Choose adhesives and paints that are labeled as non-toxic to reduce environmental harm.
- Natural Decorations: Prioritize natural elements like twine or dried berries for a touch of color which are more environmentally friendly than plastic counterparts.
Packaging and Presentation

When it comes to transforming your popsicle stick Christmas trees into eye-catching presents or attractive ornaments, the right packaging and presentation are crucial. A well-wrapped item can enhance the overall appeal of your craft.
Craft as Presentable Gifts
Materials You Will Need:
- Clear cellophane or colorful wrapping paper
- Twine or ribbon
- Gift tag
First, wrap your popsicle stick Christmas tree carefully in clear cellophane or festive wrapping paper to protect it and give it a polished look. Secure the wrapping with a piece of twine or a decorative ribbon, ensuring it complements the colors of your craft. Attach a gift tag with a personal message or the recipient’s name to add a thoughtful touch.
Displaying Your Craft
Display Ideas:
- On a mantle as part of a larger display
- Hung on the Christmas tree as an ornament
- As a centerpiece on a holiday table
When displaying your craft, position the popsicle stick Christmas tree strategically to ensure it catches the eye. If you choose to use it as an ornament, securely attach a loop of ribbon at the top, making sure it can support the weight of the craft. For table displays, surround your creation with coordinating decorations to form an attractive centerpiece.
Crafting Techniques and Tips
When creating your popsicle stick Christmas tree, the selection of glue is critical. Hot glue tends to work best, offering a quick and sturdy hold. However, it is essential to use a glue gun carefully to avoid burns and ensure a clean application.
Start by organizing your popsicle sticks by size and laying them out in the shape of a tree before you begin gluing. You will need scissors to trim any sticks to the right length for branching effects or for the base.
Here’s a step-by-step guide to assembling your tree:
- Apply a thin line of hot glue horizontally across one stick, which will serve as the spine of your tree.
- Press sticks perpendicularly onto the spine to create branches, graduating in size as you move up.
- Allow each layer to dry for a moment before adding the next to avoid collapsing or shifting.
Keep these tips in mind for the best results:
- Pre-heat your glue gun so that the glue flows smoothly.
- Test the strength of each stick’s bond before proceeding to the next to ensure stability.
- Work on a surface that’s easy to clean, like wax paper, to catch any drips.
| Material | Purpose |
|---|---|
| Popsicle Sticks | Frame and branches of the tree |
| Hot Glue | Fast-binding adhesive for construction |
| Glue Gun | Precision tool for adhesive application |
| Scissors | Cutting sticks to size |
By following these methods and tips, your popsicle stick Christmas tree will not only hold together well but also have a professional-looking finish.
Storage and Maintenance

When storing your popsicle stick Christmas trees, protect them from damage by wrapping each ornament in tissue paper or bubble wrap. Place them in a sturdy, plastic storage bin to prevent crushing. Organize your ornaments in layers, separating each tier with a sheet of cardboard for added stability.
Your homemade trees might include elements such as construction paper, which is prone to fading and damage if not cared for properly. Here’s a handy table to ensure your decorations last:
| Material | Care Instructions | Storage Tip |
|---|---|---|
| Popsicle Sticks | Keep dry; avoid bending | Store flat to maintain shape |
| Construction Paper | Avoid direct sunlight to prevent fading | Store in a dark, dry place |
Seasonal Checks:
Inspect your ornaments at the beginning and end of each season for any signs of wear or damage. If any repairs are needed, do so before storing to avoid surprise breakages next year.
Temperature Control:
Maintain a consistent, moderate temperature where you store your Christmas decorations. Extreme heat can warp popsicle sticks and cause paper to become brittle.
Utilize silica gel packets within your storage containers to combat moisture and keep your popsicle stick trees in pristine condition. When displaying your trees, keep them away from direct heat sources such as fireplaces to prevent damage.
By following these simple guidelines, your crafted ornaments will remain a cherished addition to your holiday decor for years to come.
Conclusion
Crafting popsicle stick Christmas trees is an enjoyable activity that combines creativity with tradition. These miniature trees offer a sustainable option for holiday decoration, often repurposing materials that might otherwise be discarded.
- Advantages:
- Eco-friendly: Utilizing recycled materials.
- Customizable: Adaptable to different color schemes and décor styles.
- Cost-effective: Minimal investment required for supplies.
Incorporating edible ornaments made from healthy snacks is not just an aesthetic choice but also a smart way to promote healthier options during the festive season. Crafting these trees can be a fun family activity, making it a perfect opportunity to spend quality time together while engaging in an easy recipe for crafting.
Here’s a quick guide to get you started:
- Gather your materials: popsicle sticks, glue, paint, and decorations.
- Paint your sticks and allow them to dry.
- Arrange the sticks in a triangular tree shape and glue to secure.
- Decorate your tree with items such as buttons, sequins, or small snack items.
- Display your creation or use it as a thoughtful, handmade gift.
Your popsicle stick Christmas tree can be a delightful addition to your festive décor, or even serve as an inventive gift that showcases your dedication to both creativity and sustainability. Enjoy the process and the cheerful presence these charming trees add to your holiday celebration.
Troubleshooting Common Issues
When working on your popsicle stick Christmas tree, you may encounter a few challenges. Here are solutions to common issues to ensure your project is successful.
Issue: Glue Not Sticking
- Solution: Ensure surfaces are clean. For better adherence, lightly sand the contact points before applying the glue.
Issue: Hot Glue Burns
- Care: Use a low-temp glue gun and apply glue carefully. Keep a bowl of cold water nearby to immediately cool any accidental burns.
Issue: Uneven Edges
- Fix: Use a utility knife to trim edges. Make smooth, careful cuts to avoid splintering the sticks.
Glue Drying Too Fast
- Work in small sections and apply glue to one stick at a time. If necessary, rehearse your placement before applying the glue.
| Challenge | Proposed Solution |
|---|---|
| Struggling with alignment | Use a ruler or grid for straight alignment. |
| Sticky residue | Rub the area with an alcohol wipe to remove stickiness. |
| Difficulty applying pressure | Use binder clips or clothespins to hold sticks in place while the glue dries. |
Remember to work in a well-ventilated area and to take breaks if you are working on the project for an extended period. If you follow these tips, your popsicle stick Christmas tree should come together smoothly and look great for the holiday season.
Frequently Asked Questions

In this section, you’ll find answers to common questions about crafting popsicle stick Christmas trees, ranging from required materials to creative decoration ideas.
What materials are needed to create a popsicle stick Christmas tree?
To create a basic popsicle stick Christmas tree, you’ll need popsicle sticks, glue, green paint, a paintbrush, and decorations such as glitter, beads, or sequins.
Can you provide a step-by-step guide on making Christmas tree ornaments with popsicle sticks?
- Arrange popsicle sticks in a triangular tree shape and glue them together.
- Paint your tree green and let it dry.
- Decorate with glitter, beads, or other ornaments.
- Attach a string or a ribbon loop to hang the ornament from your Christmas tree.
How can popsicle sticks be incorporated into Christmas crafts for preschoolers?
Preschoolers can layer popsicle sticks in the shape of a star or a tree and glue them onto a piece of paper. Allow them to paint and decorate with easy-to-handle materials like large sequins or pre-cut felt pieces.
What are some creative ways to decorate a popsicle stick Christmas tree?
Get creative by using buttons, yarn, ribbon, or small pompoms. You can also use a star sticker or a cut-out at the top and colored markers to draw ornaments directly onto the sticks.
How can families engage in making popsicle stick Christmas crafts together?
Families can work together by assigning tasks based on each member’s age and skill level. Younger children can paint or apply glue, while older children and adults handle more complex steps like cutting or arranging decorations.
Are there any unique popsicle stick craft ideas for school Christmas projects?
For a school project, create a 3D Christmas tree by stacking layers of popsicle sticks in a spiral pattern, or make a Christmas-themed picture frame by decorating a square arrangement of sticks with seasonal embellishments.

